Cinderella/Barbie cake tutorial
My niece had her sixth birthday party this weekend and I made a Cinderella barbie cake for her birthday, so I thought while I made the cake I would take pictures while I made it for a tutorial. Barbie cakes call all be done differently. There are cake pans in the shape of a skirt, there are also barbies that are only from the waist up on a pick so you only have to have a skirt and you just stick them in, and there are the full on whole barbies that you stick into the cake. I prefer to do it from scratch and carve the shape that I want.
Materials that you need: Barbie or doll that you are going to put in the cake
Plastic Wrap
Four 6 inch cakes
frosting
1 inch circle cookie cutter
2 inch circle cookie cutter
Cake boards (one covered for the finished cake to go on and one for underneath the cake)
Fondant
Toothpick or Dresden tool
I got a Cinderella Barbie from my sister-in-law and first got her hair the way I wanted it (who wants to find barbie hair in their cake). Then I wrapped her lower body in plastic wrap since I doubt Barbie is made with food safe plastics.
The paper towel is to make it a little more modest for the picture (I know it is a doll, but no one wants to see it).
 Attach the bottom layer of cake to the board with some frosting. Then I found a circle cookie cutter that was just a little bigger than Cinderella's lower legs. I cut the hole in the cake and then frosted the top of the cake.

The 1 inch hole in the cake
 The next layer of cake I used the same one inch cookie cutter, but after cutting the hole I used the same cutter to cut a little more from one of the sides since her calf's were a little larger than the cookie cutter. Place that layer of cake on top of the first one and push down gently to secure it to the frosting.
 Add another layer of frosting and cut a hole in the next layer of cake. I used a 2 inch circle cookie cutter. And place this cake on top of the last one and gently push down to secure it to the frosting.

Repeat with the fourth layer of cake and cut it a little wider with the two inch cookie cutter like I did with the second layer. You don't want to make the holes too big or barbie will flop around in the cake. Make them just big enough for her to fit in. Once they are all stacked chill the cake in the freezer for about 20 minutes to let it set up and carving a chilled cake is easier than a moist crumbly one. After it is chilled insert barbie in the cake and start carving down the top and sides of the cake to make them look like a skirt. Always start by cutting just little bits because you can always cut more off. You can always try and add cake if you mess up by securing it with frosting, but it isn't always easy.
Carve with a serrated knife. Since it is a smaller cake I used a serrated stake knife.

Once the skirt is to the shap that you like crumb coat the outside of the cake. Especially when you are doing chocolate cakes I reccomend crumb coating them because it makes it easier to not get chocolate crumbs everywhere. Crumb coating is a thin coat that you spread around the entire cake. The you let it set or firm up by setting it aside for 20 minutes or chilling it in the freezer for15 or so minutes. I like to put mine in the freezer if I am covering them in fondant (it makes it easier to cover).

Roll out your fondant until it is the size you need and cover and smooth down the sides of the cake. I used one of my spatulas to cut the hole in the top. At the bottom of the skirt I turned it under and made pleats in it to make it look as if it is flowing.

I started next with the back of her boddice. I raised up her arms so they wouldn' t be in the way. And I brushed a little bit of shortening on her body so the fondant would stick to it. I rolled out a square piece and cut it a little longer than needed since part would be in the cake and the rest would be covered up. It wraps just to the middle of her sides where you would find the seam of a dress.
Then I took another square piece and wrapped it around the front. I used my fingers to shape the top and turned over the sides to make a nice seam. (I placed Cinderella in a cup so I wouldn't have to hold her while putting it on. If you lay her on the counter it will leave marks in the fondant.)

Materials that you need: Barbie or doll that you are going to put in the cake
Plastic Wrap
Four 6 inch cakes
frosting
1 inch circle cookie cutter
2 inch circle cookie cutter
Cake boards (one covered for the finished cake to go on and one for underneath the cake)
Fondant
Toothpick or Dresden tool
I got a Cinderella Barbie from my sister-in-law and first got her hair the way I wanted it (who wants to find barbie hair in their cake). Then I wrapped her lower body in plastic wrap since I doubt Barbie is made with food safe plastics.
The paper towel is to make it a little more modest for the picture (I know it is a doll, but no one wants to see it).
 Attach the bottom layer of cake to the board with some frosting. Then I found a circle cookie cutter that was just a little bigger than Cinderella's lower legs. I cut the hole in the cake and then frosted the top of the cake.
The 1 inch hole in the cake
 The next layer of cake I used the same one inch cookie cutter, but after cutting the hole I used the same cutter to cut a little more from one of the sides since her calf's were a little larger than the cookie cutter. Place that layer of cake on top of the first one and push down gently to secure it to the frosting.
 Add another layer of frosting and cut a hole in the next layer of cake. I used a 2 inch circle cookie cutter. And place this cake on top of the last one and gently push down to secure it to the frosting.
Repeat with the fourth layer of cake and cut it a little wider with the two inch cookie cutter like I did with the second layer. You don't want to make the holes too big or barbie will flop around in the cake. Make them just big enough for her to fit in. Once they are all stacked chill the cake in the freezer for about 20 minutes to let it set up and carving a chilled cake is easier than a moist crumbly one. After it is chilled insert barbie in the cake and start carving down the top and sides of the cake to make them look like a skirt. Always start by cutting just little bits because you can always cut more off. You can always try and add cake if you mess up by securing it with frosting, but it isn't always easy.
Carve with a serrated knife. Since it is a smaller cake I used a serrated stake knife.

Once the skirt is to the shap that you like crumb coat the outside of the cake. Especially when you are doing chocolate cakes I reccomend crumb coating them because it makes it easier to not get chocolate crumbs everywhere. Crumb coating is a thin coat that you spread around the entire cake. The you let it set or firm up by setting it aside for 20 minutes or chilling it in the freezer for15 or so minutes. I like to put mine in the freezer if I am covering them in fondant (it makes it easier to cover).

Roll out your fondant until it is the size you need and cover and smooth down the sides of the cake. I used one of my spatulas to cut the hole in the top. At the bottom of the skirt I turned it under and made pleats in it to make it look as if it is flowing.

I started next with the back of her boddice. I raised up her arms so they wouldn' t be in the way. And I brushed a little bit of shortening on her body so the fondant would stick to it. I rolled out a square piece and cut it a little longer than needed since part would be in the cake and the rest would be covered up. It wraps just to the middle of her sides where you would find the seam of a dress.

Then I took another square piece and wrapped it around the front. I used my fingers to shape the top and turned over the sides to make a nice seam. (I placed Cinderella in a cup so I wouldn't have to hold her while putting it on. If you lay her on the counter it will leave marks in the fondant.)

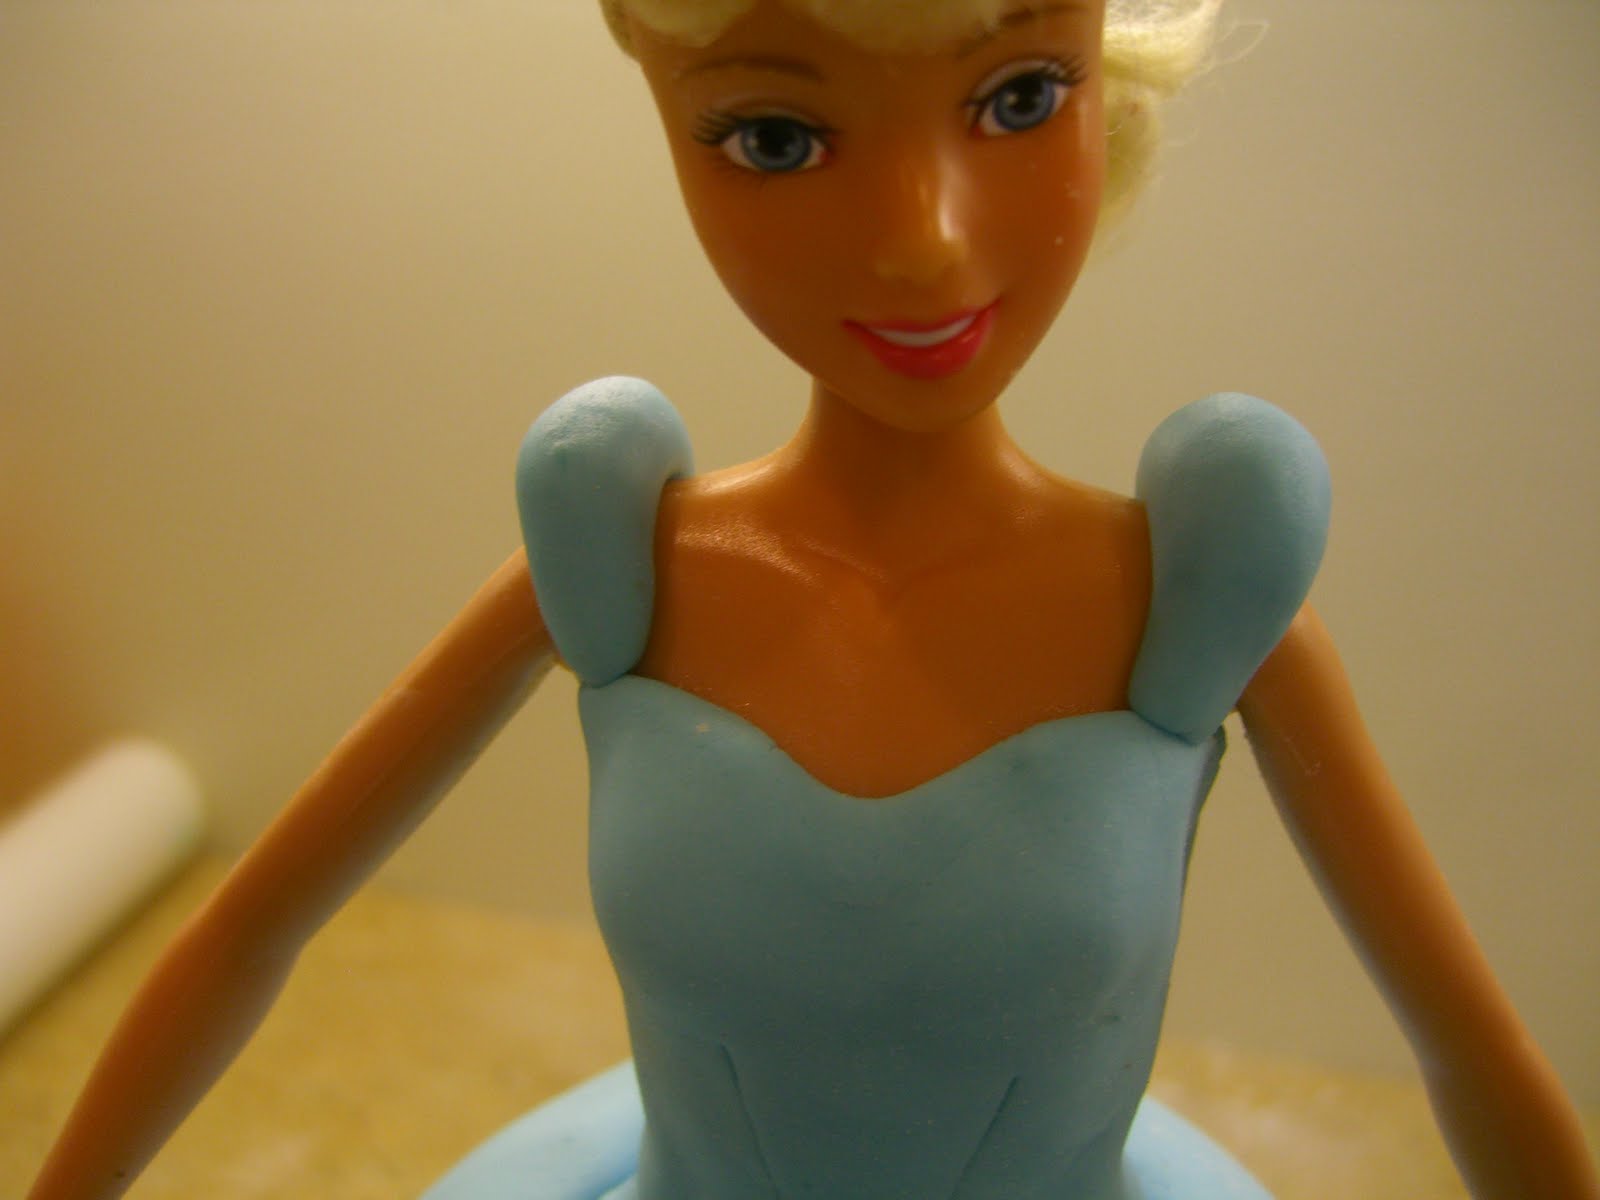
For the puffy sleeves I rolled two small balls into sausages. Then leaving the middle I rolled on either end of the sausage to make the ends smaller than the middle.

Put a litle bit of shortening where they go on her shoulders and gently place them on.

I then placed the doll inside the cake and dusted the whole dress with a super pearl luster dust to give it just a little bit of sparkle. I dry dusted it. (It is an edible sparkle dust).


Put a litle bit of shortening where they go on her shoulders and gently place them on.
I then placed the doll inside the cake and dusted the whole dress with a super pearl luster dust to give it just a little bit of sparkle. I dry dusted it. (It is an edible sparkle dust).

For the bustle I rolled a larger ball into a sausage and wrapped it around her waist. Then I used a dresden tool or you can use a tooth pick to make the folds into it. I put a little fondant ribbon rose and brushed it with a silk white luster dust to finish it off.
 If you have any questions let me know and I would be glad to help.
 If you have any questions let me know and I would be glad to help.

Can you come to Utah and help me make this? Thats my question. hahahaha very cute!!
ReplyDelete